Thursday, May 19, 2011

Power Drills In The Woodturning Workshop: From Holes To Sanding


Over the years, the hand held electric drill has become a mainstay of the general woodworking shop. Recent developments have made it into a drill, screwdriver, not driver, and sander. Such a versatile tool well deserves to be in the woodturner's arsenal.
While drills are available in sizes from one quarter inch to one half inch depending on the maximum diameter drill bit they can mount, the three eighths hand drill is the most common size sold and meets all the demands of most woodturners.
Obviously, the drill can be used to drill holes of various sizes. Simple and inexpensive jigs are available to allow it to be used as a bench model drill press although the costs of small bench model drill presses allow most shops to have have both types in use. As such they are stable and accurate enough to drill pen blanks and small projects for use of mandrels and other holding devices.
One of the great uses for power drills has become their ability to serve as screw drivers and nut drivers. This is extremely handy when mounting faceplates to bowl blanks and similar work. Screws with wide centers and deep threads are needed and require a fair amount of torques to drive them. Number fourteen self tapping sheet metal screws work well. If they are obtained with a Phillips or Robertson head an appropriate driver bit in the electric drill makes fast work of the process. It is a good idea to have one of the modern drills with adjustable tension on the chuck so that the drill stops driving once the screw is seated. Pilot holes may not be needed in green wood but if they are in dry hardwood, the drill is handy for that use as well. Some of the screws come with hexagonal heads and the appropriate driver serves well for them.
Many woodturners use a four jaw chuck and have various size jaws for different purposes. While it would be good to have a different chuck for each size jaw, the costs often prohibit this. With the appropriate type of bit for the electric drill to fit the screws holding the jaws, it makes the removal and replacement of them quick and easy.
Sanding is not the favorite chore of most woodturners. Bowls and other faceplate items have large areas to sand and the grain tends to vary making the job harder and longer. A simple sanding pad for the drill allows the sand paper to move in the opposite direction to the wood, making the process go much quicker. This has become such a part of woodturning that appropriately sized disks are readily available from most woodturning and sandpaper suppliers.
While the small, drill powered lathes on the market are viewed as little more than toys by most woodturners, the electric hand drill still has a rjole in the woodturning shop. Most woodturners would do well to have couple at hand.

Monday, May 09, 2011

Simple Chainsaw Bar and Chain Maintenance for the Woodturner


While the chainsaw is a valuable tool for the woodturner it is usually used intermittently. Maintenance is necessary as it is for all tools and can be easily accomplished.
It should be noted that chainsaws are extremely dangerous as tools go and should be treated with respect. Instruction in the use of the saw is necessary before using it and safety is the concern of the user. Protective clothing should be worn along with proper face, ear and eye protection. A well maintained saw is a safer saw.
First of all, examine the bar and chain of the saw. The chain should be sharp with all teeth the same size. Sharpening the chain involves two procedures, filing the teeth and filing the depth gauges. The teeth are easiest to file using the recommended size file and a guide that both holds the file and ensures that it cuts to the right depth. Each tooth should be the same length when finished so if one is duller than the rest and requires more filing, file the other teeth to the same length. One tooth longer than the others tends to pull the bar in its own direction and can cause binding. It is a good idea to touch up the teeth at every filling of gasoline or, if the saw is electric, every couple of hours of use. If the saw hits the ground or something other than wood, consider it dull and sharpen the chain. Some sawyers like to have their chains professionally ground at regular intervals and file in between.
The depth gauges are projections in front of the teeth and prevent the teeth from taking too great a cut and possibly catching and kicking the bar back at the user. If they are too high, on the other hand, the teeth are not able to cut to depth and quickly dull from rubbing the wood. Again, a simple jig from your chainsaw supplier allows for easy measuring and ensuring that each depth gauge is filed to the proper height. Depth gauges should be checked every few chain sharpenings.
The bar should be straight, clean and tight to the saw. There are adjustments for proper tension on the chain and it should be set according to your manufacturer's instructions. Too much tension can lead to over heating and ruining both bar and chain while too little tension can cause the chain to catch and kick the saw at the user or to fling the chain off and cause injury. Generally, all that is involved is tensioning a set screw until the chain moves easily on the bar. The bar is held in place with a couple of nuts that need to be checked every filling or at frequent intervals as the vibration of the saw may cause them to loosen.
One of the most obvious things to check and one that is too often not done is to make sure there is plenty of bar oil in the reservoir. This is different from the oil that is mixed with the gasoline and appropriate oils should be used in either case. Bar oil gets flung off by the movement of the chain but helps greatly in keeping the bar cool and in smooth cutting. Most saws are designed to need the reservoir filled with every filling of gasoline. Woodturners tend not to run a saw long enough to run it dry and may forget to fill the bar oil reservoir.
Routine maintenance should become just that, routine. Once the habit is formed, it ceases to be a chore and instead becomes an enjoyable part of the woodturning practice.

Thursday, April 14, 2011

Basic Equipment You Will Need to Start Woodturning Projects

 While it is easily understood that a wood lathe is needed to begin woodturning projects, there are a few other necessities before starting. Many of these are already found in the typical woodworking shop while others will need to be purchased.

The basic wood lathe comes with one or two faceplates for bowls and other large work; a spur center and tail center for holding spindle projects; and a couple of tool rests for different sized work. No cutting tools are generally supplied with the lathe.
While experienced turners will purchase individual tools, it is advisable for the beginner to get a beginning set. This will contain the necessary tools for spindle work. Usually this will be a roughing gouge, a couple of spindle gouges of different sizes, a couple of skews of different sizes, a couple of scrapers of different sizes and a parting tool. Such a set should be high speed steel, not carbon steel which is cheaper but does not hold an edge very long compared with high speed. Later on bowl and faceplate tools can be purchased or made. If the beginner is anxious to begin turning bowls, a one quarter inch bowl gouge will get them started and different sizes can be purchased later on.
Once the tools are purchased there needs to be a means to sharpen them. Woodworkers new to woodturning will be amazed at how often turning tools need to be sharpened. The usual means to a good edge is a grinder however most shop grinders have wheels too coarse to give a good edge on high speed steel. An aluminum oxide wheel of appropriate size should be purchased. It should be around eighty grit and a wheel dresser to keep it round and clean is really a necessity.
While some turners consider a sharpening jig to be a luxury, for a beginner it is almost a necessity. Sharpening woodturning tools freehand is a skill in its own right if not an art. Learning it at the same time as trying to learn woodturning is difficult and learning to turn with dull tools is almost impossible. A jig should be purchased or made at the very beginning.
One of the things that makes woodturning special is the ability to much of the time sand and finish a project on the lathe. Sandpaper in grits from eighty to two hundred twenty is usually found in the workshop but some turners like to go as high as two thousand grit for some projects. Generally up to three hundred twenty will be fine. Danish oil and similar finishes work well for most woodturnings and again is a typical supply of most shops.
Safety is an important part of any woodworking shop and work around a wood lathe is no exception. A face mask to protect from flying wood is a necessity as is a dust mask to protect the lungs from sanding. Hearing protectors are good to have. Most lathes are fairly quiet but saws, drills, sanders and dust collectors as well as other shop tools can cause hearing problems.
Tools to ready the wood for the lathe will likely be already in the shop. Bandsaws and table saws are often used and a chainsaw is a part of most woodturner's arsenals of tools.
A quick look at a woodturning catalogue will convince any aspiring woodturner that bits and pieces can be acquired for years to come but these should get one started. Certainly a lot of enjoyment are contained in these few simple items.

Wednesday, April 06, 2011

Four Glues For Woodturners – Answering Three Different Needs

    The hardware and speciality stores abound with adhesives of all sorts these days. Confusion can easily beset the woodturner buyer unless the needs are known for the glues. Thankfully four different and readily accessible glues are all that is needed for ninety-nine percent of woodturning requirements.

     First of all is the typical woodworker's glue or aliphatic resin emulsion which most call carpenter's glue or yellow glue. It is similar to polyvinyl acetate or white glue but has a better tacky quality and less initial slippage. Both dry to a bond that is stronger than most woods, at least when applied to side grain. It is often used to attach a waste block to faceplate turnings and may have paper separating the waste block and the turning wood. In addition, it is a good glue to use building up segmented turnings.
     Second is another standby of many wood shops, epoxy resin glues. This is a two part adhesive that is great for attaching handles or any situation where it is necessary to adhere metal to wood. It will also allow the joining together of damp woods while most other adhesives require the wood to be dry.
     Third is cyanoacrylate adhesives or “super glues” commonly called CA glue. These have become the standard of many woodturners. Thin or watery CA is used to fill cracks in burls and other woods while the medium can be used to attach waste wood to faceplate turning even on end grain or wet wood. Thick CA can be used to fill voids in woods that might otherwise be thrown away.
     The rise in the popularity of turning wooden pens has brought polyurethane glues to a similar popularity. While some pen turners use CA to attach the brass sleeves to the wooden pen blanks, others find the gap filling ability of the polyurethane glues along with their great strength to be valuable in turning pens and similar projects. It should be noted that the foam of polyurethane glues which serves to fill the gaps has very little strength but the the strength of the bond where two materials meet is exceptional.
     One of the least used or understood glues in the woodturner's possible arsenal is hot glue from a hot glue gun such as the crafters use. It can used to quickly make temporary jigs as well as to hold waste blocks to faceplate turnings. One should use the high heat and not the low heat glues.
     A little common sense in the use of five types of glues should make the use of each of them reasonable and valuable to woodturners. Each has its place to play in the workshop.


Sunday, March 20, 2011

Making Wooden Bowls: Thickness Considerations For The Woodturner

   When making wooden bowls the woodturner enters a world of creation that is thousand of years old. People have been using bowls for a long time and making them just as long. The same design questions that face the potter also face the woodturner. One of these is just how thin or how thick to make the vessel walls. Some questions need to be answered to give some guidlines.

  First of all there is the intended use of the bowl. Is it going to be functional such as a salad bowl or is the intention to be visual as an art piece? Generally, a functional bowl will be thicker so as to give stability and a sense of security. Artistic turnings may be extremely thin to give a sensation of lightness and perhaps an ephemeral quality. On the other hand a different artistic turning may be very thick and heavy to present other feelings and qualities to the beholder.
A third category may be a bowl made to impress and perhaps to impress woodturners in particular. In that case it may be so thin as to allow light to pass through the oiled wood. To make one of these, woodturners hang lights behind the turning piece and thin the bowl to allow an even distribution of light through the walls. It is a good test of skill and a learning experience.
   Functional bowls should have walls that are thin enough to work with the intention of the piece and thick enough to seem right. As a rule of thumb and eighth of an inch of thickness for every inch of diameter seems about right with a bit more for six inches and under and a bit less for bowls over sixteen inches. So an eight inch bowl might be one quarter inch thick while a six inch bowl could be three sixteenths and a sixteen inch bowl, three eighths. Most of the time the best thing to do is not to worry about the exact measurement so much as the look and feel.
   Where the bowl is to be used is also a consideration. Restaurants may have a certain criteria they want followed while a bowl turned for the outdoor deck on a summer night might have walls an inch thick. The popcorn may blow away but the bowl will still be there.
   Most of the time the best thing to do is relax and make the bowl. If the lines look good and the bowl feels right, chances are the design is good. Sometimes all the practise pays off and the bowl looks absolutely fabulous. The hunt make all the turning just that bit more special.

Thursday, March 10, 2011

Mounting Wood On A Lathe: Getting A Square Ready


One of the more common ways for people to come to a wood lathe is a woodworker expanding their skill set by wishing to turn legs for a table. This involves mounting a square length of wood to the lathe. Such a common skill requires only a few tips for success.
Assuming the lengths are truly square it remains to mount them to the lathe so that they are truly centered and secure. This is generally a mounting “between centers.”
There are two centers on a lathe, the head stock center or spur center and the tails stock center or tail center. The spur center has a point in the middle and two or four spurs surrounding it. The point keeps the wood from shifting and the spurs engage the wood so that the head stock can drive it.
Tail centers will be either solid or will have bearings mounted so that the center spins. Such a center is called a live center and is highly recommended. Solid or “dead” centers require a drop of oil from time to time to allow good motion of the wood on them. The mid point of tail centers sticks into the center of the wood and prevents it drifting under the pressure of turning.
The center of each end should be carefully found and marked. While there are various implements on the market for doing so, the easiest system is to hold the wood upright in the bench vise and draw lines between the diagonals. The lines cross at the center. Generally the ends of the square will not be seen as the table will obstruct them so the lines are not an issue. If they become one, sandpaper will quickly fix things.
It is a good idea to take an awl and mark the center with a small indentation. When the centers press into the wood they have a tendency to move a bit to the side so the indentation helps to start them on center.
Some people like to make a small cut along one set of diagonals with a saw so as to give a groove for spur center to settle into. This is not necessary and it is simpler and faster to put the center in place off the lathe and strike it smartly with a mallet to seat it into the wood for a good drive. Once the spur center is in the lathe and in place in the wood, the tail center is brought up and the point is pushed into the center depression in the wood. Next the tail center is locked in place and then the center is snugged up. Now things are ready to turn.
Squares are mounted to the wood lathe for many reasons or projects such as candle sticks, rolling pins, potato mashers and table legs to name only a few. Mounting between centers can look flimsy at first but a few episodes will quickly build confidence and craftsmanship, adding to the great enjoyment of turning wood.

Saturday, March 05, 2011

Chainsaw Use For The Woodturner


   Very quickly, woodturners learn that one of the difficulties of woodturning is the acquiring of wood large enough for faceplate turning. It is both difficult and expensive. However, there is often a good supply of local wood in log form if the means to deal with it are available. A chainsaw makes the handling of logs and their processing into turning blanks readily accessible.
   One of the first things to know about a chainsaw is its danger. A chainsaw is one of if not the most dangerous power tools in the woodworker's arsenal. The working part of the saw is a bar covered with a moving cutting chain that is designed to crosscut through hardwood. As such it will not even pause for flesh. In addition it is a simple matter to catch the tip of the bar in such a manner so as to make the saw kick back or jump at the user with amazing speed and power. With this said, there are many people who use a chainsaw day in and day out without problem. While the risk of using any power tool rests with the user, it is a good idea in this case to get instruction from an experienced user before handling the saw on your own.
   Chainsaws come in a variety of types and sizes but for most woodturners there are some simple considerations to think of when buying. Saws are sized by power and bar length. As a general rule subject to all the dangers of generalities, a sixteen inch bar will be long enough for most turners and twelve will be a little short at some point in the woodturning career. Another general rule is to buy the most powerful motor you can afford. It is easier on the user and the saw assuming the weight is also good for the user.
   The power source will be either electric or gasoline. Gasoline is more convenient outside the shop but there is a danger form carbon monoxide when running an internal combustion engine indoors not to mention the huge noise from the motor. Electric saws require heavy extension cords and in general cut slower than gas saws, but are quieter and get the job done.
   The turner should learn to sharpen and maintain the saw. Chains dull quickly if they hit rocks or nails in the wood and sometimes they touch the ground when cutting logs to length. A chain that hits the ground is dull and needs sharpening. This is not difficult to learn and files for sharpening are cheap. If the saw is kept with the bar oiled and the fuel for a gas saw mixed properly, a routine maintenance check by a good repairman or dealer is all that will be needed for long saw life.
   Chainsaws need not be fearful for the woodturner to use and will make the gaining of bowl blanks and the like much easier. Good instruction can make all the difference in the pleasure added to getting ones own wood for woodturning.

Thursday, February 24, 2011

Choosing A Wood Lathe: Remember The Budget

Buying a wood lathe sounds like a simple proposition. Check the budget, look at the lathes in the budget category, choose the one that seems good and away we go. However, like most things in life, it is not that simple. One of the more difficult things for the beginner or first time buyer, is knowing how to gauge the budget in the first place.
Wood lathes are more individual than many other woodworking tools. While there are certainly many models of tools such as table saws, for example, there are certain features expected in particular price ranges and the saws will be fairly uniform in that range. It is expected that one may purchase one, put it in the work shop, and go to work. The wood lathe is a different proposition.
While most wood lathes in a given price range will generally be similar in quality this is not always so. A mini lathe will usually be better quality than a full size lathe in the same cost bracket, for instance. Two lathes of the same price may have different mechanisms for controlling speeds and overall quality of the lathe with the more expensive speed controller will likely be less than that of the other machine. It is necessary in the budget to question what is wanted in the lathe for weight, quality of construction, type of speed control and size among other things.
All other things being equal among lathes, there is the extra strain on the budget to consider. That table saw will be ready to work right out of the box, but not so for most lathes. The typical wood lathe comes with the basic machine ready to run and with centers and a faceplate to hold the wood, but without tools to cut the wood nor any means to keep them sharp. Again in contrast to the table saw that came with a blade that rarely needs sharpening and then by a professional shop, the lathe comes with no tools and no means to sharpen them even though they will need frequent sharpening. It often comes as a surprise to a beginning wood turner that in some circumstances tools need to be sharpened every couple of minutes.
So the budget will need to stretch to a set of woodturning tools, a grinder and a set of aluminium oxide wheels at the very least, not to mention sundries like sandpaper and finishes. All of these should be allowed for in the budget before shopping for the wood lathe. It should be noted that a decent set of woodturning tools or a four jaw chuck may each be more expensive than a beginner's wood lathe.
It is possible to get started turning wood on a modest budget. Some reasonable planning is necessary but many woodturners have begun on light lathes and used them for many years.

Thursday, February 17, 2011

Sharpening Woodturning Tools: Making Sense Of Grinder Wheels For Sharp Wood Lathe Tools


Getting a good edge on a wood lathe tool is one of the great difficulties for a beginning woodturner and an ongoing concern for intermediates and experts. While the grinder is the tool of choice for woodworkers sharpening tools for wood lathes, getting it set up with the correct wheels can be a confusing challenge. It need not be with a couple of simple steps.

First it is necessary to move in thinking of the grinder as a sharpener. Many people come to woodturning from general woodworking where the grinder is used to remove lots of metal in a hurry so as to grind away nicks and breaks in chisels, plane irons and the like. Water stones and honing implements are used for final edges. Woodturners move from the grinder to the wood. Most shop grinders are not set up for this and the problem is largely the wheels.

Thus the second consideration is to replace the grinder wheels. While it is agreed that since woodturners generally use high speed steel tools they should have aluminium oxide wheels, there is a lot of confusion in the catalogues as to what color wheel to get and what bond to have. The color reflects individual manufacturers attempts to make choosing between grades of their particular wheels and has little to do with other wheels on the market. Consideration then should be given to grit and bond.

The bond of a wheel refers to how friable the material is that holds the aluminium oxide together. More friable bonds allow the material to break away quickly thus leaving a sharp cutting and cooler grinding surface. Unfortunately, the most friable bonds manufacturers recommend for woodturners groove, pit and wear quickly requiring a lot of wheel dressing and expensive replacement. Thankfully, almost any aluminium oxide wheel generally available to the home market is sufficiently friable for good sharpening with good wear so making sense of the friable numbers of bonds is not necessary. Just get a good wheel.

Third is consideration of the grit. While it may encourage argument, a good setup is a fast cutting wheel of about 46 grit on one side of the grinder and a sharpening wheel of eighty to one hundred on the other. With a good jig especially, this will meet all the shaping and sharpening needs of the woodturning shop.

Simply put, a couple of inexpensive aluminium oxide wheels of appropriate grit will give a lot of sharpening satisfaction and help to make a lot of shavings for a long time to come. Keep it simple and keep it fun.

Friday, February 11, 2011

Beginning Woodturning: Four Tips Before You Get Started

As you look at a bewildering display of turned wood objects and an even more bewildering display of woodturning tools, it can quickly get discouraging to consider getting started turning wood at all. However if you look at the wide array of people who turn wood you quickly realizes that woodturning is an accessible hobby for just about anyone. The real question is how to get started. Here are four quick and easy ways to begin the entry into the world of wood turning and working on the wood lathe.

  1.  First take your time. Do not rush out and buy the first lathe you come to just to find out it is not suited for the objects that you would like to make. Read a few books on woodturning. Most libraries have one or two and maybe even a video to watch. It may be for a more advanced turner but will certainly give you some ideas of what you are getting into. Look for the basics such as what tools are needed and what kinds of wood lathes are available. Remember that you are starting out and all the bells that whistles that the pros like are probably not necessary for you.
  2.  Once you get a feel for the basics, consider what you might like to make for your own purposes, be they gifts, table legs for other projects, pens or whatever. Think of what accessories you might need other than the lathe or turning tools. Budgets start to come into play here. You might be able to find specialized books on your choices or even classes at the local community college or school dealing with this particular interest.
  3.  Consider taking a class in woodturning. Many woodworking classes in night school will have a lathe available and may have an instructor that knows how to use the machine. In addition look for a woodturning club in your area. A lot of communities have them and most have a fair number of watchers and even members who do not turn but are considering getting started. As a rule, woodturners like to demonstrate their skills and introduce others to the art and craft.
  4.  Stay safe as you start. Get a face shield and dust mask and use them. Hearing protectors are great too. While most lathes are fairly quiet wood shop tools, most wood turners will use chainsaws, band saws, planers, drills and the like with all the noise they provide. Safe woodworking is by far the most enjoyable.

These simple tips will get you started as you begin the interesting and compelling art and craft of woodturning. Soon you will be giving tips to someone else with the same interest.

Wednesday, November 12, 2008

Wood Everywhere

November is here already. As a matter of fact, it is almost half gone and the stores are all Christmas nutty. One of the things that is happening around my part of the world; Nova Scotia, Canada; is the sudden appearance of wood piles as folks get in next year's wood.

The idea is to get green wood this year to cut to length and split for next year's fires once it is dry. Some folks even go a couple of years ahead. However, this is a woodturner's dilemma. What wood to turn and what wood to burn?

Advice? Keep the best looking stuff. Crotch wood has some great grain but can be hard to dry. So what? If it splits it is fire wood. No loss. The same with twists and turns and burls. Look for some good grain and if you find it while splitting, keep the logs from near it. If you keep your eyes open, there are some great finds in the wood pile.

By the way, keep some of the plainer, straight stuff for some kitchen spindle work and the like. Clean wood is great too.

Saturday, November 08, 2008

Bandsaw Cut

One of the most used tools for some woodturners is the band saw. In fact, I would recommend the band saw over the table saw for most turners while for cabinet enthusiasts the table saw is the first choice. However, while I consider the band saw to be one of the safest saws in the shop, safety is still an issue.

In particular there is the cut through a cylinder, not an infrequent need for many projects. Cylinders roll. If a cylinder rolls while being cut on a band saw, chances are excellent that the blade will get crimped and either draw a hand into the blade, snap the blade, weaken it to where it will snap the next time it is used or so damage it that it will come off the wheel. Of course any combination of the above is also possible.

At best, a piece of wood is damaged and at worst a serious cut is obtained with blood everywhere. Incidentally, if a catch happens it is extremely fast and a band saw for turning usually has at least a 1/2 and likely a 3/4 horse motor. There are very few people in the world strong enough to hand the wood and prevent an accident. Safety first.

Lately I had to cut off a section from a cylinder that had two diameters. For safety reasons I wanted a level cylinder. All that took was a shim under the smaller diameter. To keep the wood from rotating I simply took a clamp that rode on the table and used its holding power to grip the cylinder far more strongly than I could by hand. The arm of the clamp prevents rotation and what might have been a catch simply becomes a cut. Take your time through the cut if the wood is green especially.

Band Saw Safety Cut

Thursday, November 06, 2008

Sticking to Woodturning

There is some debate over the most important additions to the woodturner's arsenal in the past century or two. I am not going to pretend to have a definitive answer, just a couple of observations. Tool innovation has really only made small changes to hollowing, cutting and scraping tools. The four jaw chuck has made life easier in holding work but can be worked around by other methods.

I think one of the great advances has been the improvement in glues. Cyanoacrylate or CA glue in particular is used by woodturners on a daily basis. Thin CA can be dripped into a crack followed by fine dust from the same wood and the crack is almost invisible after the finish is applied. Some people use thin CA as a finish on small objects. Thicker CA is used to glue in brass tubing for pens and other projects. It is also unique in that it can make an almost instant bond with wet wood and can be used to hold a green piece to a waste block for turning.

Still, one of my favorite uses for CA is to simply hold wood together for turning. This CA dripped into a punky spot will keep it hard enough to turn. Thicker CA can glue together a piece that would otherwise split off.

CA has helped us to become better users of rare resources, pretty woods.

Tuesday, November 04, 2008

Thnks to the Old Timers

Maybe "Old Timers" is a poor phrase to use here. many of the old time turners are not old. Some of them have only have only been turning for a year or two. What makes them "old timers" is simply that they have been turning wood longer than others.

However, what sets woodturning apart from most other crafts is the desire to share information. Old Timers are more than willing to bring a new comer under their wing and get them started on woodturning addiction. There is a sense of camaraderie that needs to be extended into more parts of life.

Most of our woodturning meetings have a couple of sharing times. During one, someone who is advanced in a technique shows the rest of us how they do it. Another more informal sharing time is the show and tell. People who have been turning for a few weeks or a lot of years bring in their latest pieces and talk about how they made them. Comments are almost always encouraging and often the old timers will quiz the new guys on how they did something.

questions, encouragement, sharing, friendship, humility

Who would NOT want to be a part of this? Maybe this is why a number of our club do not turn, they just like the meetings.

Monday, November 03, 2008

Another Use for Bottom Jaws

Woodturners have variations on how to turn the bottom of bowls. Most use a donut jig or some sort of chuck jaws such as ones with plans on my web site, Bottom Jaws. However, any of these methods can also answers what has been a problem for many of us, how to save a bowl that has become a funnel.

By this I mean the times that I have had a bowl almost finished to find that a lapse in attention has caused me to turn through the bottom into the waste block I commonly use. I know; using a depth gauge would have prevented the difficulty but so would hove not permitting my mind to wander. However, I do know that I am not alone here, most of us have some pretty kindling with nice bowl sides and a hole in the bottom.

One way to solve the problem is to glue on a separate piece of wood to the bottom of the bowl and turn it cleanly. The difficulty is remounting to the lathe so as to leave everything centered. The answer is a flip.

1) glue the new bottom in place and about 1/4" too thick.
2) mount the bowl in the bottom jaws
3) turn a tenon on the bottom
4) FLIP the bowl over so as to hold the tenon in regular chuck jaws
5) turn the inside, sand and finish
6) FLIP the bowl into the bottom jaws
7) remove the tenon
8) turn and finish the bottom

hope it helps

Sunday, November 02, 2008

Simple Tool Rack

I had a question lately about making a tool rack for woodturning tools. Generally I have seen three variations on the theme.
1) a series of tubes on end to take the tool shafts. The tubes may be in a bucket or box.
2) a box similar to a shallow drawer, sometimes literally a shallow drawer with dividers to keep the tools from rolling into one another and ruining the edges
3) a board with holes drilled into it to accept the tool shafts. The board is usually fastened to a wall or near the lathe.

I like the latter concept as it is quick to make and convenient to use. However, even easier is to pick up one of those tool holders at the discount bin of the hardware store. They seemed designed to hold all sorts of screw drivers and wrenches or the life but the holes seem to fit things life standard lathe tools, knock out bars, tommy bars for chucks, lathe wrenches and the like.

Friday, October 31, 2008

Poppy Hint

Here in Canada Remembrance Day is just around the corner, November 11, and poppies are being presented for donation reception by our Legionnaires. Lots of other
countries celebrate the same day under different names like Armistice Day or even Poppy Day. When I was serving as Legion Padre in Perth-Andover, New Brunswick, we would gather at the cenotaph in Perth for 11:00, move to the the cenotaph in neighboring Aroostook Village to conduct their cenotaph service, and then go to Fort Fairfield, Maine to assist the VFW in their service as they did not have a padre. Besides, some of our memberes had served in the American forces.

As a pastor, nephew of veterans, former Legion padre, and part time services padre, I encourage everyone who can to donate to the work of the Legion and VFW and to wear the poppy to commemorate the day and be thankful for the peace we enjoy. Take time during the day to pray for our vets and for the new ones being created in so many parts of the world. Of course I am thinking today of Afghanistan and Iraq in particular, but our men and women are fighting in many parts of the world and still lay down their lives for God, family and country.

Here is hint for the poppy wearers. I am one of those people who can lose a poppy just by thinking about it, or not. So, if you are one of those woodturners who makes ear rings and has a stash of ring backs, put one over the pin of your poppy so it does not fall off. Other wise go to the cheapie display of jewelry at the discount store and pay a buck or two for some gaudy junk you would not be caught dead wearing or knowing that giving it to your wife may be an act of suicide. After all, why toss the good stuff? Dump the ear rings and keep the backs for poppies. Now you can afford to give extra for the poppy because you know you only need one and fewer will be wasted. Better for the environment and everyone else.


By the way, for extra brownie points get a really nice pair of earrings, hide them until after Remembrance Day, use the backs for the poppies, get the extra back from your wife and then give her the earrings. That of course is for the fellas. Ladies can find their brownie points on their own.


In Flanders Fields
by John McCrae
Written in Flanders on May 3, 1915

In Flanders fields the poppies blow
Between the crosses, row on row,
That mark our place; and in the sky
The larks, still bravely singing, fly
Scarce heard amid the guns below.

We are the Dead. Short days ago
We lived, felt dawn, saw sunset glow,
Loved, and were loved, and now we lie
In Flanders fields.

Take up our quarrel with the foe:
To you from failing hands we throw
The torch; be yours to hold it high.
If ye break faith with us who die
We shall not sleep, though poppies grow
In Flanders fields.

Wednesday, October 29, 2008

Sharpening: Halloween Helper

Here is a quickie for people struggling to picture the shape needed for a spindle gouge and in some cases a bowl gouge with swept back wings. It is also the shape I sometimes use for an Oland tool, especially for bowls.

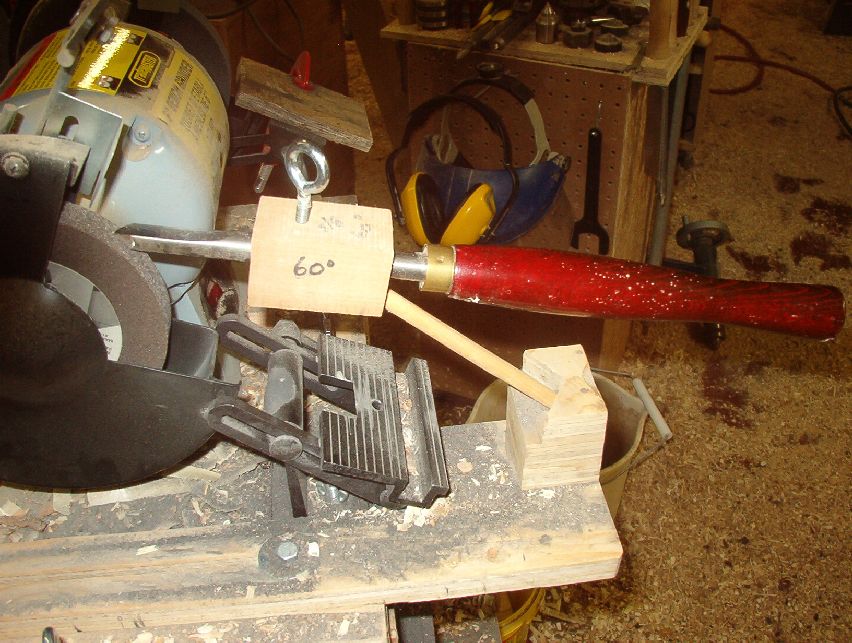
Some people call the shape a lady's finger nail. The other day I saw a perfect example in a local dollar store. The Halloween stuff was up for display and among all the clown paint and fake blood there were some packages of ridiculously long fake nails. They looked the perfect shape for a spindle gouge at 60*

Not a bad sharpening aid for the price. Sure, some folks might look at you funny when they see long, red, plastic nails by the grinder, but the cuts should be good.

Have a nice Halloween and may all your tools be sharp.

Tuesday, October 28, 2008

Sharpening, Once Again

I have been catching up on my emails to be answered and one question that comes up over and over again is that of sharpening. Really this is not surprising. After all, dull woodturning tools make for lousy and frustrating woodturning. Add to this the prevailing argument over free hand or jig sharpening and you either get a frustrated newbie who

  1. can not get the hang of freehand sharpening that we who have turned for a while learned after only two or three years
  2. decides the only way to go is to get a jee whiz bang jig and then finds out that it adds a hundred or two to his after lathe cost of tools, grinder, special wheels, sanding pads, and whatever else
Years ago I built my $2.50 sharpening jig with the understanding that if it worked well for me, I would get a commercial one. You see, I was not convinced that I wanted to go from free hand to jig sharpening. The jig worked so well that I never got around to replacing it. One of these days I may, in a fit of energy, remake it in metal, but I doubt it. It works so well, why fix it?


jig with spindle gouge

There are not so much plans since every grinder is a bit different, but rather a discussion of building with photos over at sharpening jig. If you keep going to the last page there are videos of it working. For a couple of bucks, it is worth a shot.

Hope it helps. Keep turning.

Monday, October 27, 2008

New Video in the works

Sorry to be so long in posting. I am working on it as life settles down into the new church, a different schedule for karate, and less time at the lathe. A question that has been raised to me a few times now is where to begin turning?

By this most woodturners to be seem to wonder if they should start by making table legs or spurtles or bowls or whatever. I think the best thing to start with is making a stick and a bunch of shavings. In fact, I think it is good for an experienced turner to make a stick and a bunch of shavings every now and then.

It teaches us or reminds us from whence we come. Take a log and mount it onto the lathe between centers and start removing stuff. First a rough object is reduced to a smooth one. The features of the log are revealed; knots, weak wood, insect holes and the like. Practice is given in entering at a precise place, cutting downhill with the grain, riding the bevel and so on.

Besides, this is fun and a lot of shavings are obtained for the compost pile.

I have shot the footage of me turning down a 10" diam by 16" log and should have it edited and uploaded soon. I will let you know.